HANGING UP PLATES
I don’t think anything looks nicer than a
properly dressed back cabin with all its brass, lace and especially hanging up
plates.
Some call them ribbon plates while some call them lace plates but boaters called them ‘hanging up plates’.
Many people have said to me that they don’t like them because they rattle and ‘ching’ (not if they are hung correctly) So that brings me on to today’s chosen subject (background Mastermind Music) that of decorating a traditional back cabin. (You will note: back cabin – not boatman’s cabin as that’s a modernism
Quite a lot of people with both ex working and modern ‘traditional’ boats have plates hanging in their cabins, but how many actually know how to hang them in a back cabin, and while I do not profess to be any sort of expert, I feel that I did learn from one back in the 1970’s when I was decking out the then, new back cabin of my large Woolwich butty Bingley.
Like many, I tied a loop of white
‘knicker elastic’ through the top of three or four of the slots in the chosen plate,
decided where I wanted to hang it, and screwed a small brass cup hook in that
position then hung the plate on it. Next a second plate would be hung in the
same manner on another cup hook, then, when all plates were in position, they
would be tied to each other with further pieces of ‘knicker elastic. ( Or
something similar) The result was untidy, random, had no order to it and left
large areas of cabin sides showing.
Roger and Jean had come over to stop for a couple of days visiting Pat and Clive Naturally, they were invited over to their butty cabin of the evening, along with myself we spent the evening chatting about ‘boaty things’ and consuming several pots of tea. During the conversation the topic of hanging up plates sarcastically came up. Straight away Roger stated “Jean will show you if you want” and so the next night the lesson began. This involved the purchase of a ball of white cotton string and green plastic coated gardening wire.
I thought I would share with you how I was shown to hang both plates and
the lace in between them. This method can apply anywhere in a back cabin but I
am describing the section of cabin side behind the range.
Start by sorting your plates into groups, types, size etc. have a good idea in
your mind how you want to lay them out. See how many plates it will take to go
across the area you are covering, then how many rows it will take from top to
bottom of cabin side. In the case below five plates in a row and three rows
Remember that the top row of plates will be set down half the depth of your
lace from the top. Screw a cup hook in at the top of where each column of
plates will be. As shown below.

Start with the bottom row first and hang each plate in turn with a length of
string through the ribbon slots, ensure each string length is identical so the
plates are all in a line. Then tie each plate to each other with short pieces
of string going between the ribbon slots. At this point the row of plates will
probably hang away from your cabin sides, don’t worry this will be fixed later.
Then fix two more cup hooks at each end, above the bottom row of plates and at
a height above the row of plates equal to half the depth of your lace. As shown
below

![]()
![]()

Now form a loop with a pencil in the end of the gardening wire and loop it over
the one side cup hook. Now stretch the
wire across the front of the plates/strings across to the other side cup hook,
and twist it round the cup hook then cut it off with snips.
And now to the lace. Start by tying a loop in each end of a length of
string equal to the exact length between the two side cup hooks (remember this
string has to be tight between the hooks. When you have this right (after a bit
of practice probably) thread the string in and out of the top of the length of
lace you have cut. Now put the string loops over the cup hooks. As shown below

The tight wire behind the top edge of the lace holds all the plates back close
to the cabin sides, while the string holds the lace.. The process is now
repeated with the next row up being tied back to the same cup hooks at the top.
As shown below

This is then followed by two more cup hooks and another line of wire and
stringed lace. As shown below.

And finally the top row is fitted in the same manner and the finished panel is
as set out below.

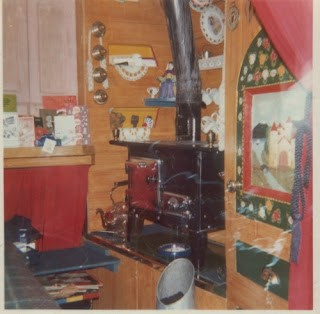
Well that’s all folks, just to finish off here is a couple of photos of inside my
back cabin and her anging up plates.
and so if you follow this simple method of hanging up your plates you will not
'bang 'em about
Blossom


No comments:
Post a Comment